Wednesday, October 5, 2011

Healthy Eating: Eggplant Parmigiana


My husband loves eggplants!  He can eat eggplants the whole day - fried, roasted, boiled, in a salad, what-have-you!  I thought of making eggplant parmigiana for him one weekend instead of our usual pasta snack (lasagna, baked mac, spaghetti).

This recipe is from Panlasang Pinoy.  The steps are very easy and the ingredients are readily available.  I didn't use the marinara sauce from this site though.  I used Giada de Laurentiis' Marinara sauce recipe from the Food Network.

You should try this one weekend.  It's a good side dish for lunch or you can get one serving for a snack.  I made baked salmon as the main dish for lunch with this as our side.  Nice combination!

Prepare the marinara sauce first.

Marinara Sauce
Recipe by Giada de Laurentiis from Food Network

  • 1/4 cup extra-virgin olive oil
  • 1 small onion, finely chopped
  • 1 garlic clove, finely chopped
  • 1 celery stalk, finely chopped (didn't have this available)
  • 1 carrots, peeled and finely chopped
  • 1/2 teaspoon sea salt (I used ordinary iodized salt)
  • 1/2 teaspoon freshly ground black pepper
  • 1 (32-ounce) cans crushed tomatoes
  • 1 dried bay leaves (didn't have this available
Heat olive oil in a pan.  Saute onions, garlic, carrots and season with salt and pepper.  Add the tomatoes and simmer for 1 hour.


Eggplant Parmigiana
Recipe from Panlasang Pinoy


  • 2 pieces eggplants (the recipe used huge eggplants {check the tutorial video in the site}so I used 4 pieces of eggplants)
  • 2 pieces raw eggs
  • 1/2 cup bread crumbs (I used Japanese breadcrumbs)
  • 1 teaspoon garlic powder
  • 1 teaspoon salt
  • 1 teaspoon ground black pepper
  • 1/2 cup olive oil
  • 6 ounces mozarella cheese, shredded
  • 2 1/2 cups marinara sauce (see recipe above from Giada de Laurentiis)
  • 1/2 cup parmesan and romano cheese, grated (I used parmesan only)
  • 1/2 teaspoon dried parsley flakes (didn't have parsley flakes so I skipped this)


Peel and slice the eggplants.


Lightly beat eggs in a bowl.

In a separate bowl, mix the bread crumbs, garlic powder, salt and black pepper.


Dip the eggplants into the eggs and roll in the bread crumb mixture.


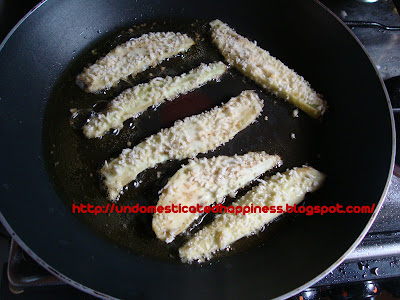
Heat the olive oil in the pan and fry the eggplants until their golden brown. 


Place the fried eggplants in a plate covered in paper towels to absorb the extra oil.


Preheat your oven to 350F.

In an oven dish, pour 1/3 of the marinara sauce.


Arrange a layer of eggplants on top of the marinara. 


Pour some of the marinara sauce on top then sprinkle with parmesan.  Repeat this for 2 or 3 layers.


On the topmost layer, spread the shredded mozarella cheese.


Bake for 18-22 minutes.  Cool for 10 minutes and serve!


Pawis rating: 3 of 5 easy but I found that frying is time-consuming :-( 

Thursday, September 29, 2011

Lemon Meringue Pie


Lemon Meringue Pie is one of those basic pie recipes one should master as a baking newbie.  It is so basic that kids in cooking shows know how to do it.  And a talented teenager has actually mastered and shared her perfect pie in her website Whisk Kid.

The pie recipe in Whisk Kid used an actual pie crust.  Stupid me cannot even make a decent pie crust.  I blame it on the hot humid weather of the Philippines!  So, I had to be resourceful and just use a basic graham cracker pie crust.

This pie has the right combination of sweet and tart.  I love how the lemon balances the sweetness of the meringue.

Lemon Meringue Pie
from the Whisk Kid (Lemon Filling and Meringue recipe adapted from Allrecipes.com)


I had a very frustrating experience making the pie crust from the website so I had to resort to the graham cracker pie crust from Ina Garten's Barefoot Contessa Family Style cookbook.

2 cups graham cracker crumbs
1/3 cup sugar
1/4 teaspoon ground cinnamon
1 stick (1/2 cup) unsalted butter, melted

Mix all ingredients together and press into a 9" pie plate (you will have some leftover because the recipe is for an 11" tart pan).  Bake at 350F for 10 minutes then cool to room temperature.


Lemon Filling
4 egg yolks, room temperature in a heatproof bowl
1 cup sugar
2 tbsp flour
3 tbsp cornstarch
1/4 tsp salt
1 1/2 cup water
2 lemons, juiced and zested
2 tbsps butter, room temperature


Preheat oven to 350F.

In a medium saucepan, mix the sugar, flour, cornstarch and salt.  Add the water, lemon juice and zest and cook in medium high heat.  Stir frequently until this mixture comes to a boil.

Add the butter until melted.  Pour half of the mixture to the egg yolks and whisk immediately.  Pour the egg yolk mixture back into the saucepan and return to heat.  Cook while stirring frequently until the mixture is very thick.

Pour this mixture over your prepared pie or graham cracker crust.

Meringue

4 egg whites
6 tbsp white sugar

In a large bowl, whisk the egg whites until foamy.  Gradually add the sugar and beat until stiff peaks form.  


Spread the meringue over the filling making sure to seal the edges. 


Bake for 10 minutes or until the meringue top turns golden brown.


I should have a kitchen torch :-(


Pawis rating: 5 of 5 because of the pie crust!!! Otherwise, this is a simple recipe for beginners :-)

Monday, September 5, 2011

Tablea Chocolate Cake

Disclaimer: I'm a home cook wannabe, not a photographer :-) My photos below will show you why.

This is my second recipe from the September 2011 issue of Yummy magazine. This month's issue is all about Filipino food - yes, I know, it can be boring. But, tablea? Never boring! Give me anything chocolate and I'm awake LOL!

First off, the Filipino dishes are not bad at all! I tried the Fishtek Tagalog and the kids loved it! A simple and tasty dish. The Prawns in Aligue is next in my list.

Most important is an article on tablea desserts! I'm super tempted to try the Tableche Flan with Kahlua but (1) I don't have Kahlua, and (2) I don't have enough eggs at 12mn! Yes, I cook at odd hours of the night/morning.

I went with the Tablea Chocolate Cake from Chef Aileen Anastacio and I was not disappointed! The cake was super-moist. It stayed that way even after 1 day in room temperature and 2 days in the ref. The chocolate taste was right on spot - not too sweet in the right gooey-ness. This is the type of chocolate cake you'd get from a good restaurant. The entire cake was finished in one day (and this is a double layer 8 inch!) and a slice was left in the ref for my husband. It was that good!

Chocolate Tablea Cake
Yummy Magazine September 2011

  • 1/3 cup cocoa powder (I used unsweetened Hershey's cocoa powder)
  • 3/4 cup tablea chocolate, chopped finely (I didn't chop and I didn't have a food processor, so I grated the tableas)
  • 1 cup boiling water
  • 1/2 cup butter, cubed and softened (I used unsalted)
  • 1 3/4 cup sugar
  • 3 eggs
  • 1 tbsp vanilla extract
  • 1 3/4 cup all-purpose flour
  • 1 1/2 tsp baking soda
  • 1/4 tsp salt
  • 1 cup milk

For the icing:
  • 20 ounces bittersweet chocolate, chopped finely (I used chocolate chips)
  • 3 cups heavy cream
  • 2 tbsps corn syrup

The recipe called for 2 9-inch round baking pan. I only have 1 9-inch so I used 2 8-inch round baking pans instead.

Grease the pan with butter. Line the bottom with parchment paper. Grease and flour the pan and parchment. I already used flour when I remembered I should have used cocoa powder instead in dusting the pans. This is so that you don't get white spots when you take your cake off the pan.

Instead of chopping the tablea, I grated them. This gave me a fine powder which was easier to melt in water.

Place cocoa powder and grated/chopped tablea chocolates in a bowl. Pour boiling water and stir until chocolates are melted and smooth. Set aside to cool.

Preheat oven to 350F.

In a bowl, cream butter and sugar until light and fluffy.

Add eggs one a time beating well after you add each one. Add the vanilla.

Slowly add the cocoa mixture and beat well.

In a separate bowl, whisk flour, baking soda and salt.

Alternately add the flour mixture and the milk, starting and ending with the flour mixture. Beat until well blended.

Pour the batter into the pans. Bake for 30 to 35 minutes. Check for doneness by inserting a toothpick in the center. Toothpick should come out clean.

See all that flour on the sides of the pan? That should be cocoa powder :-(

Cool in a wire rack for 10 minutes.

You can prepare the icing while your cakes are baking.

Place the chocolate and cream in a saucepan over medium heat.

Stir constantly while chocolate is melting. Be careful not to burn your chocolate. Do this for about 20 minutes or until the chocolate is thick.

Remove from heat and stir in corn syrup. Transfer to a bowl and let cool in the ref for about 2 hours. Check and stir the mixture every 15 minutes.

Remove one of your cake from the pan and transfer to a cake turntable.

Place your icing in the middle of the cake and spread evenly on the layer of the cake. Note that I didn't even bother leveling the cake. I want this messy and gooey LOL


Remove the other cake and place on top of the first layer.

Place more icing on top of the cake and around it. Don't care about keeping the cake neat. Chocolate cakes are not meant to be neat LOL


Went all downhill from this point LOL
Go ahead, you can lick all those chocolate icing
Sliced - but just one layer - let's keep our blood sugars low :-)

Pawis rating: 2 of 5 suprisingly easy! Taste factor - 10 of 10 - a definite must-try!

Tuesday, August 30, 2011

Bacon Obsession

As Chef Sharwin Tee of Lifestyle Network's Curiosity Got the Chef puts it, everything is better with bacon. I so agree!

Bacon is a regular pantry staple in our house and I buy at least a pack for 1 week. Ever since I tried the Lean and Mean variety of Purefoods, I was hooked. I never liked greasy bacon so the lean type is perfect for me. I'm not saying this because I'm trying to be health conscious but that's just me - I don't like greasy bacon.

So when I tried comparing the Lean and Mean variety with the regular kind of a different brand, I was shocked! Look at the price difference! Let's just say I'm not about to change my bacon preference anytime soon.

Purefoods Lean and Mean Bacon at P171.50
Regular bacon of another brand at P199.50 = price diff of P28.00
I'm sticking to this!

Fishtek Tagalog


Filipinos love soy-based dishes - adobo and the local bistek. Who would not? It's simple, easy, and flavorful. A quick dish best served with lots of white rice!

This recipe is very easy and uses the healthier option of fish fillet instead of beef. I saw this in the September 2011 issue of Yummy magazine and remembered my last pack of cream dory fillet in the freezer.

Fishtek Tagalog
Yummy Magazine September 2011

  • 1/4 to 1/3 cup soy sauce
  • juice of 6 to 10 calamansi (about 2 tbsps)
  • black pepper, to taste
  • 5 cloves garlic, peeled and smashed
  • 500 grams cream dory fillet
  • olive oil
  • 3 onions, sliced into half moons

Cut fish fillet into 4 to 5 slices.

Combine soy sauce, calamansi, pepper and garlic.

Marinate fish in the soy sauce mixture. Leave in for about 20-30 minutes. Do not overmarinate.

Heat a nonstick pan over medium heat. Add olive oil.

Remove fish from marinade and fry in pan. Fry till golden brown or fish is cooked through.

Set fish aside in a plate.

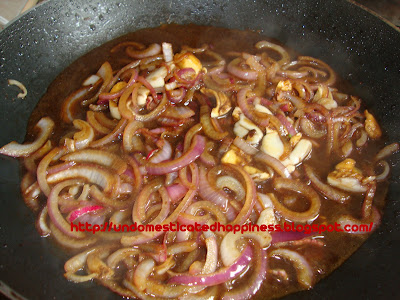
Add few drops of olive oil and fry the onions until caramelized.

When onions have caramelized, pour the marinade to the pan and simmer.

Once sauce simmers, return fish to pan and toss with the onions. Turn off heat.

Serve hot.


Pawis rating: 1 of 5 super easy!

Wednesday, August 24, 2011

Chicken Shepherd's Pie

Shepherd's pie is something I'd always order from one of the restaurants I'd regularly visit near our office. It's an all-in-one dish: carbs from the mashed potatoes, protein from the meat, and fiber from the veggies.

The dish looks pretty easy to make - like baked macaroni in individual ramekins. Searched through the sites I regularly visit and was glad to find this easy recipe.

The recipe is from Home Cooking Rocks, another site that is mostly devoted to Filipino dishes. I love that the author includes her recipes for some non-Filipino dishes as well. This one's a perfect example. From what I have tried so far, shepherd's pie is usually made out of beef. But this one's made of chicken breast fillets - just right for the health-conscious :-)

I think the hardest part in making this dish is preparing the mashed potatoes - scrubbing them, then mashing them is just painful. I say this because I don't have a nifty gadget to do this easily for me. Yes, I mashed them potatoes with my humble fork. I like my mashed potatoes with skin, so this saved me the pain of removing the skin from the hot potatoes before mashing them.

Next, the chicken dish - really good! The dish is very simple but the taste is just good. I didn't follow the recipe to the dot - I used chicken breast fillets and some Hungarian sausages because I don't have smoked ham. This combination worked well. When I started cooking this I thought the sauce would be very thick because the recipe calls for cream. So I had my milk ready. But I didn't use the milk at all. The taste and consistency of the sauce was just right.

Let's cook!

Chicken Shepherd's Pie
Recipe from Home Cooking Rocks

Make the mashed potatoes

  • 3/4 kilo potatoes or 5 pieces of medium-big potatoes
  • 1/4 cup butter
  • 3/4 cup or more of milk
  • salt and pepper
  • few tablespoons of grated parmesan cheese

Wash and scrub the potatoes clean especially if you're keeping the skin. Pierce with a fork all over and drop in boiling water. Boil for 30 minutes or until you can insert a fork easily into the potato.

When the potatoes are done, put them in a bowl and mash them.

Add the butter.

Season with salt and pepper.

Gradually add the milk. Do not pour the milk all at once. You'd want to put a small amount at a time till you get the consistency you want.

Add the parmesan.

Set aside.

Prepare the chicken filling

  • 1/4 kilo chicken breast fillets
  • 3 pieces hungarian sausage
  • 1 large onion
  • 1 small pack frozen vegetables (corn and carrots)
  • 1 small can sliced button mushrooms
  • 1 cup of cream
  • salt and pepper

Thaw your frozen vegetables.

Chop the onions.

Cut the chicken breast fillet into cubes. Season with salt and pepper.

Slice the sausage about a quarter inch thick.

Melt butter in a pan. Cook the chicken until lightly browned.

Add the hungarian sausage and cook for about 3-4 minutes. Add the chopped onion.

Add the vegetables.

Pour the cream and season with salt and pepper.

Assemble the pie

Place the chicken filling in an 8" baking dish.

Spread the mashed potatoes on top of the chicken.

Bake in a preheated 180C oven for 20-30 minutes. The pie is done when the top is lightly browned.

Nice and brown and dripping at the sides :-)

Pawis rating: 2 of 5 very easy! A simple, very tasty, all-in-one dish that even kids will like :-)